

Zipping and unzipping files is a common task used to compress and decompress files and folders on a computer. This can be useful for reducing the size of files for email attachments or archiving multiple files into a single, compressed file. On a Mac, zipping and unzipping files is a straightforward process that can be done using built-in compression tools.
Zipping a File or Folder on a Mac
To zip a file or folder on a Mac, you can follow these steps:
Step 1. Locate the file or folder you want to zip.
Step 2. Right-click on the file or folder and select “Compress.” Alternatively, you can also control-click on the file or folder and select “Compress.”
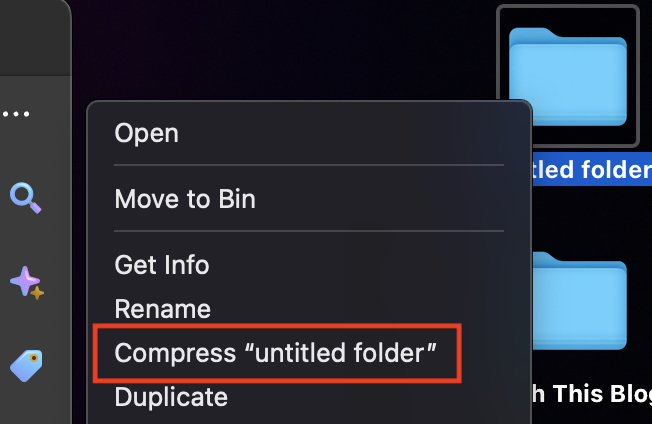
Step 3. The compressed file will be created in the same directory as the original file or folder, with the extension .zip. The compressed file will have the same name as the original file or folder, but with “.zip” added to the end.
You can then use the compressed file for email attachments, backups, or other purposes.
Unzipping a File on a Mac
To unzip a file on a Mac, you can follow these steps:
Step 1. Locate the zip file you want to unzip.
Step 2. Double-click on the zip file to unzip it. Alternatively, you can right-click on the zip file and select “Open.”
Step 3. The contents of the zip file will be extracted to the same directory as the zip file.
You can then access the unzipped files and use them as needed.
Conclusion
Zipping and unzipping files on a Mac is a simple and straightforward process that can be done using built-in compression tools. Whether you need to reduce the size of files for email attachments or archive multiple files into a single, compressed file, these steps can help you get the job done quickly and easily.
