

The act of taking a screenshot has been gaining popularity over the years. The ability to quickly take a snapshot of some content, mark it up with your own custom notes or messages, and sharing it immediately with your friends or colleagues, has been something that iPhone users have been enjoying for years. Yes, in today’s world, the screenshot feature is available on all smart devices in the market, but every brand, has its own way of doing screenshots on their devices, and today, we are going to focus on the iPhone.
In this tutorial, we will show you how to take a screenshot on your iPhone.
There are two ways to take a screenshot on the iPhone, and we are going to look at both of those options today.
Method 1 (The hardware approach)
Step 1. Browse to the content you want to screenshot.
Step 2. Press the Power button + Volume Up button simultaneously.
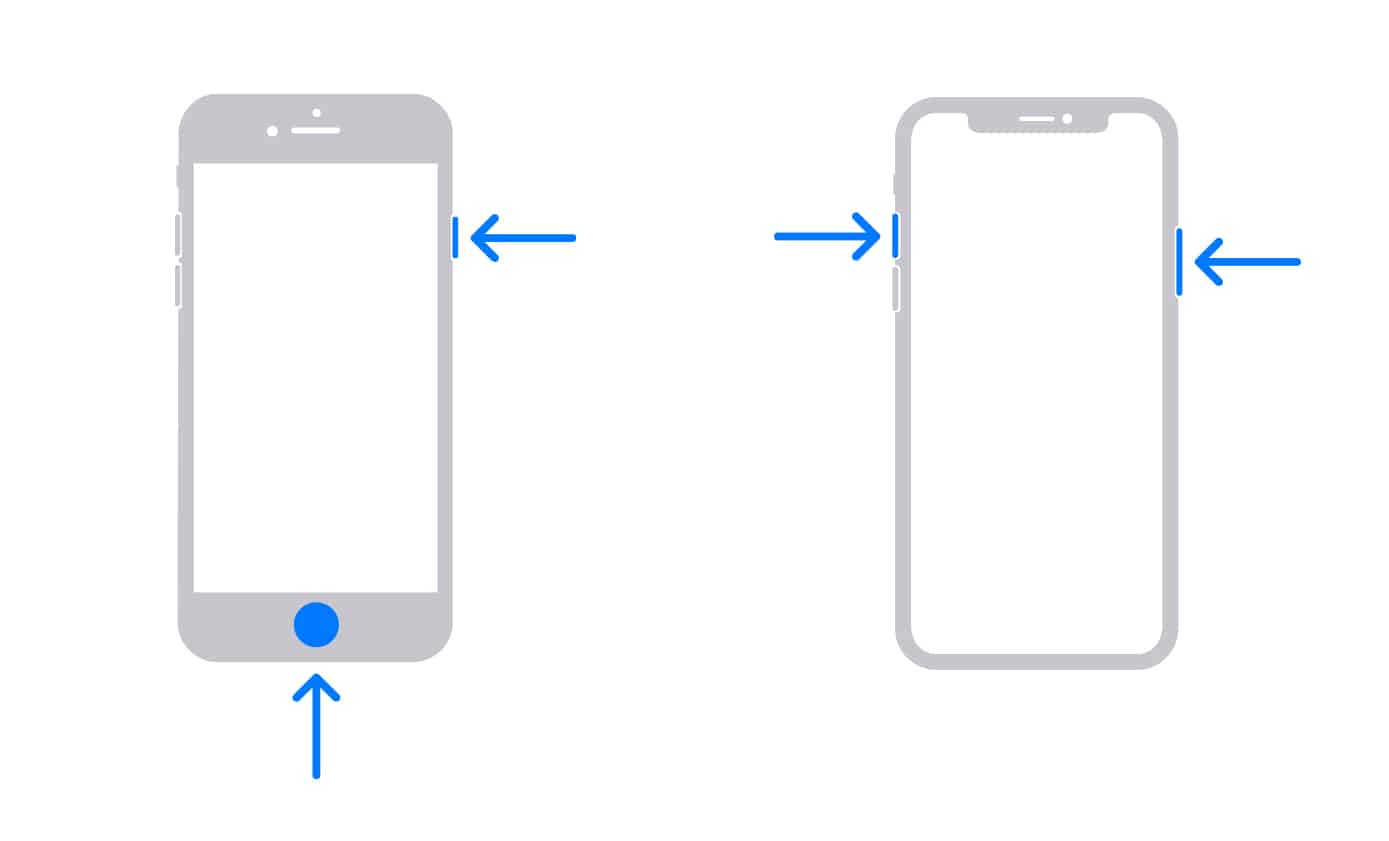
The screenshot will be taken and saved in your Gallery for further editing.
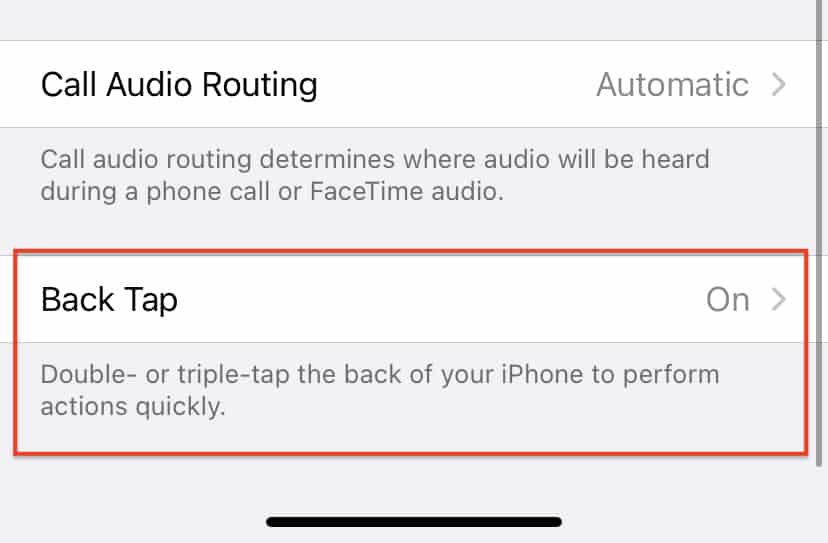
Method 2 (Through the Accessibility Settings)
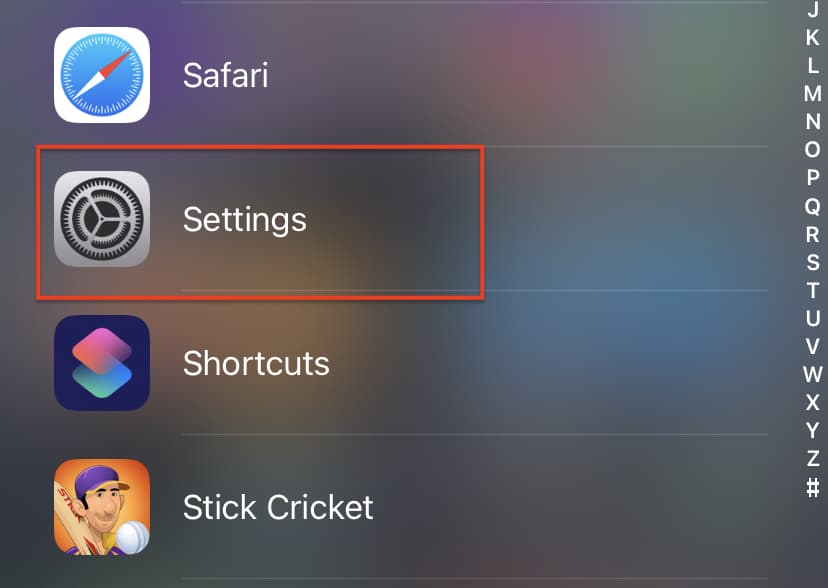
Step 1. Open the ‘Settings‘ app on your iPhone.
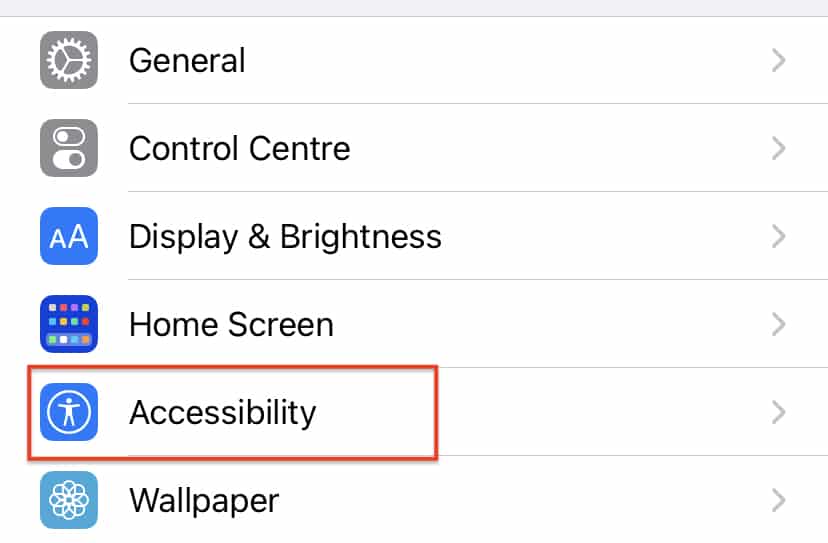
Step 2. Scroll through the settings menu and tap on the ‘Accessibility‘ option.
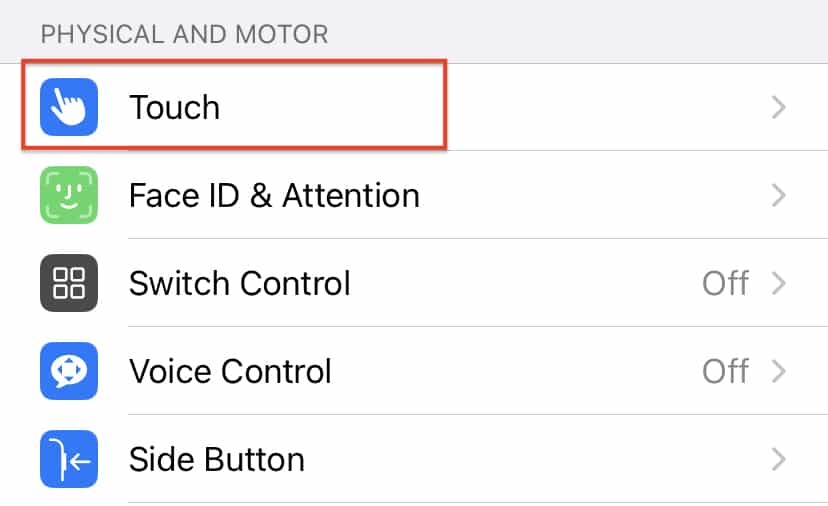
Step 3. Tap on the ‘Touch‘ option under the physical and motor tab.
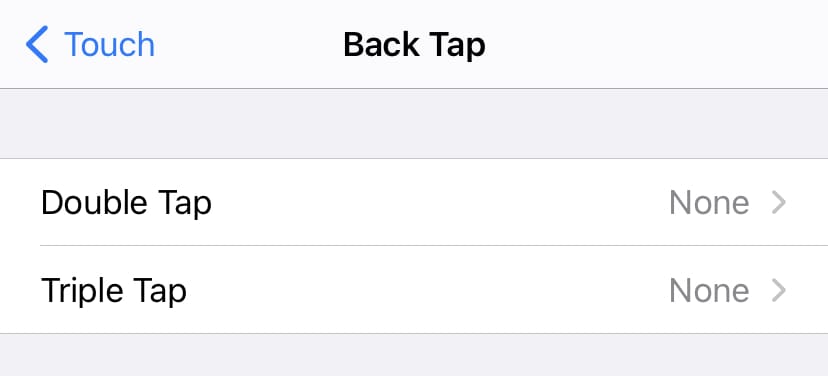
Step 4. Scroll to the bottom of the list and tap on the ‘Back Tap‘ option.
Step 5. Choose either the ‘Double Tap‘ or the ‘Triple Tap‘ option. For the sake of this tutorial, we will choose Double-tap, but feel free to choose the one you want.
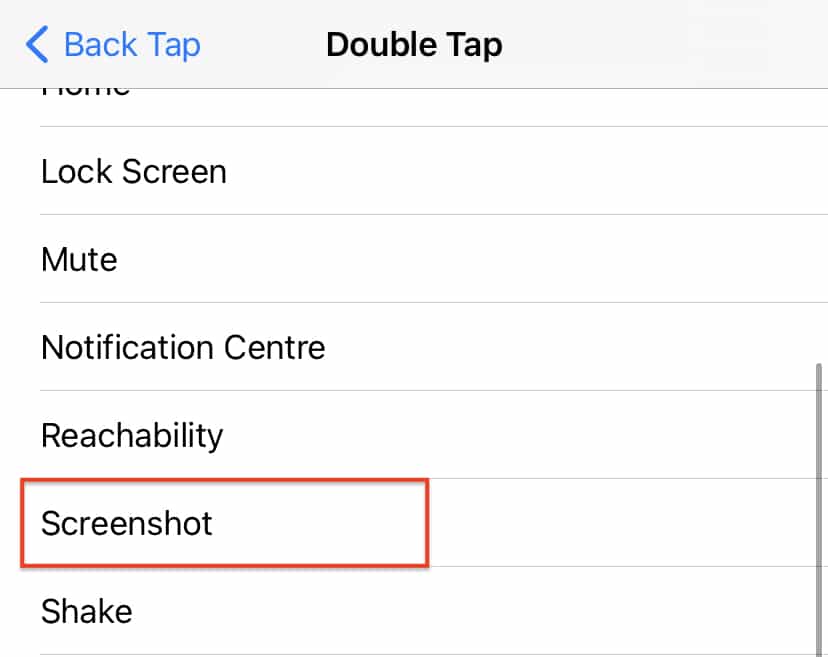
Step 6. Now, from the mapping options, tap on the ‘Screenshot‘ option.
Once you do this, the screenshot operation is mapped to the Double-tap or Triple Tap gesture. So now, if you double-tap (or Triple Tap) the back of your iPhone, a screenshot will be taken automatically.
Now, the back tap option was introduced in iOS 14, and we have seen the feature appear in the iPhone X series upwards. If you have an older iPhone and you have this feature as well on the iOS 14 platform, great. However, if the option is not there, you can always use Method 1.
