

Blender 3D is home to a treasure trove of unique and often overlooked features that, upon closer examination, reveal their incredible utility. While these tools may initially appear a bit daunting, as you become more acquainted with Blender’s interface, they evolve into indispensable assets for your creative projects. Among these valuable features lies the unassuming yet powerful 3D cursor.
The 3D cursor in Blender 3D serves as a versatile tool that empowers you to precisely dictate the placement of new elements within your 3D scene. This capability proves invaluable when dealing with complex scenes, allowing you to bypass the conventional starting point at the center and instead position new design elements exactly where you envision them.
The 3D cursor is a fundamental component that significantly enhances Blender’s prowess in animation and game asset creation, providing creators with unparalleled precision and creative control.
In the forthcoming tutorial, we will demystify the process of setting the 3D cursor in Blender 3D, unveiling the techniques that enable you to harness its potential to the fullest extent, thus elevating your 3D design and modeling endeavors.
Step 1. Open the Blender 3D application on your Desktop/Laptop.
- Ensure that you have Blender 3D installed on your computer. If you haven’t installed it yet, you can download the latest version from the official Blender website (https://www.blender.org/download/) and follow the installation instructions for your operating system.
- Once Blender 3D is installed, locate its icon on your desktop or in your applications folder, depending on your operating system.
- Double-click on the Blender 3D icon to launch the application.
- After a brief moment, the Blender 3D interface should gracefully appear on your screen, ready to unleash your creativity.
Step 2. Open a new file and save it with an appropriate name.

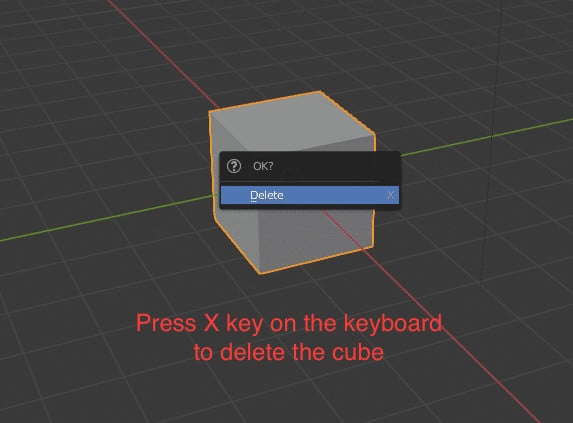
Step 3. Left-click on the default cube and delete it by pressing the ‘X’ button on the keyboard.
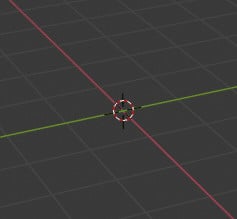
Step 4. You will now see the 3D cursor at the center of the Blender 3D workspace. This central placement of the 3D cursor serves as a reference point for your modeling and design activities, allowing you to begin or continue your work with precision and control.
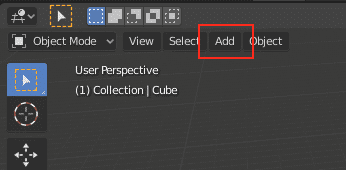
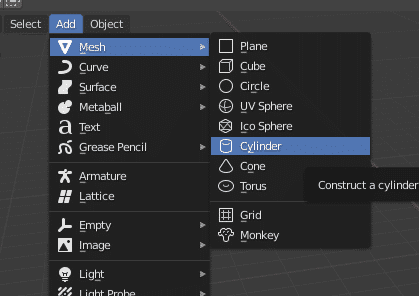
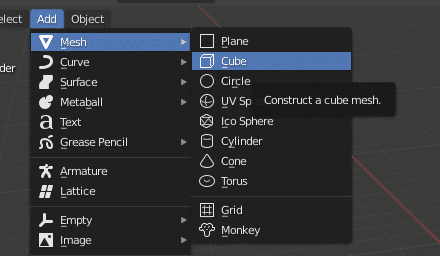
Step 5. Click on the ‘Add’ button.
Step 6. Scroll to the ‘Mesh’ option and then click on the ‘Cylinder’ option.
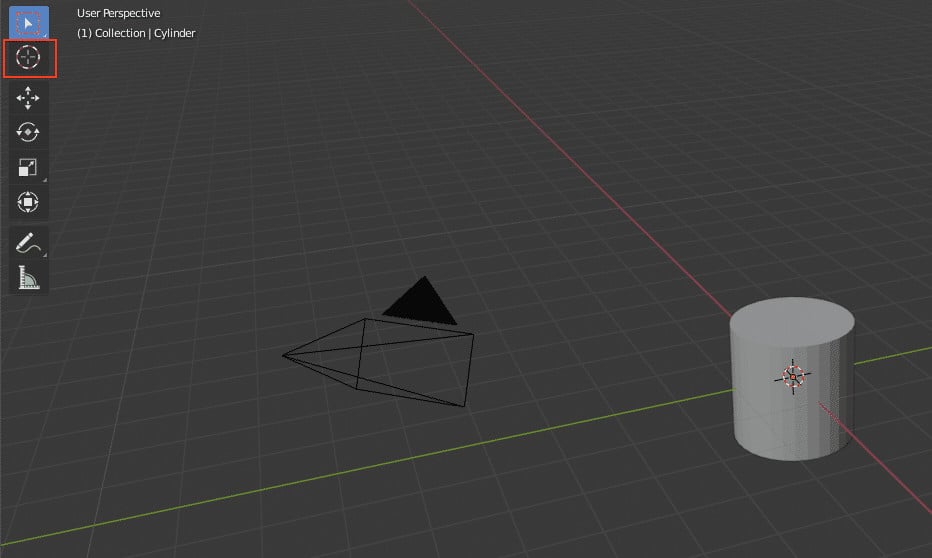
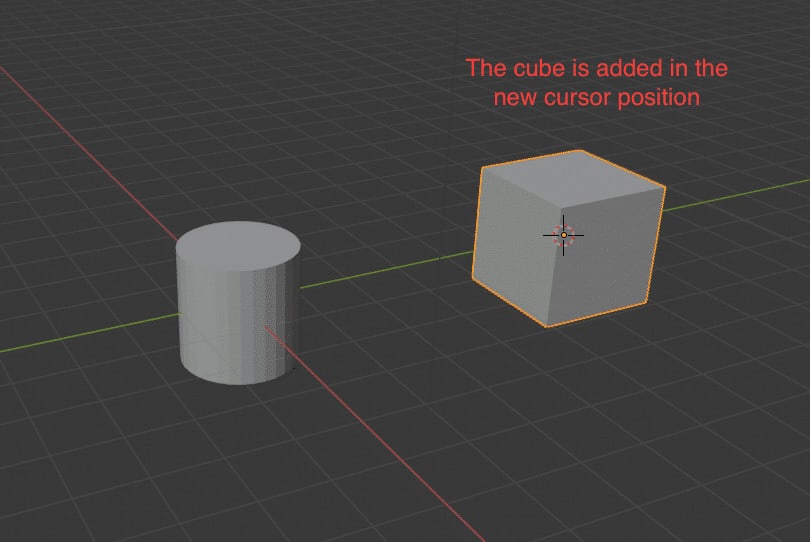
Step 7. You will see that the Cylinder is added in the centre of the Blender 3D workspace.
Step 8. Click on the ‘Cursor’ button on the left-hand toolbar.
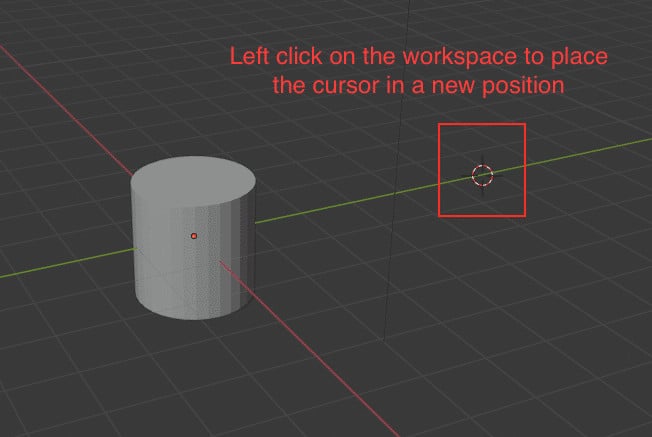
Step 9. Left-click anywhere on the Blender 3D workspace to place the cursor to a new position.
Step 10. Now, click on the ‘Add’ button and then scroll to the ‘Mesh’ option.
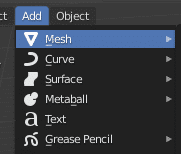
Step 11. Click on the ‘Cube’ option.
Step 12. The cube will now be added at the location of the cursor.
Indeed, setting the cursor to the desired location within the Blender 3D application is a straightforward yet essential task that enhances your precision and control. By following the steps provided, you can efficiently position the 3D cursor exactly where you need it, empowering you to create and design with accuracy and finesse. Whether you’re a 3D modeling enthusiast or a seasoned professional, this skill is a valuable asset in your creative toolkit within the Blender 3D environment.
