

If you have ever wondered which graphics card drives your Windows PC/Laptop, then your search ends here. In this article, we will take a look at how you can quickly find out what graphics card brand model features in your Windows 10 PC/Laptop.
There are two ways to get around this and we will be explaining both of them here, so read on.
Method 1 –
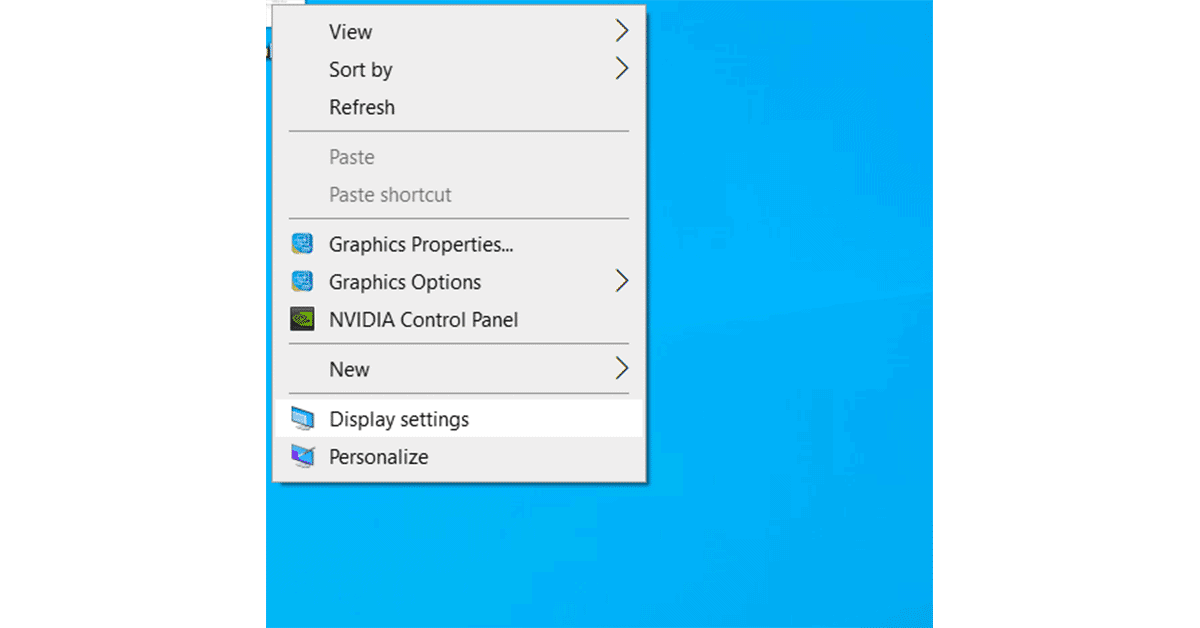
- Right-click anywhere on your desktop, and from the drop-down menu, select Display Settings.

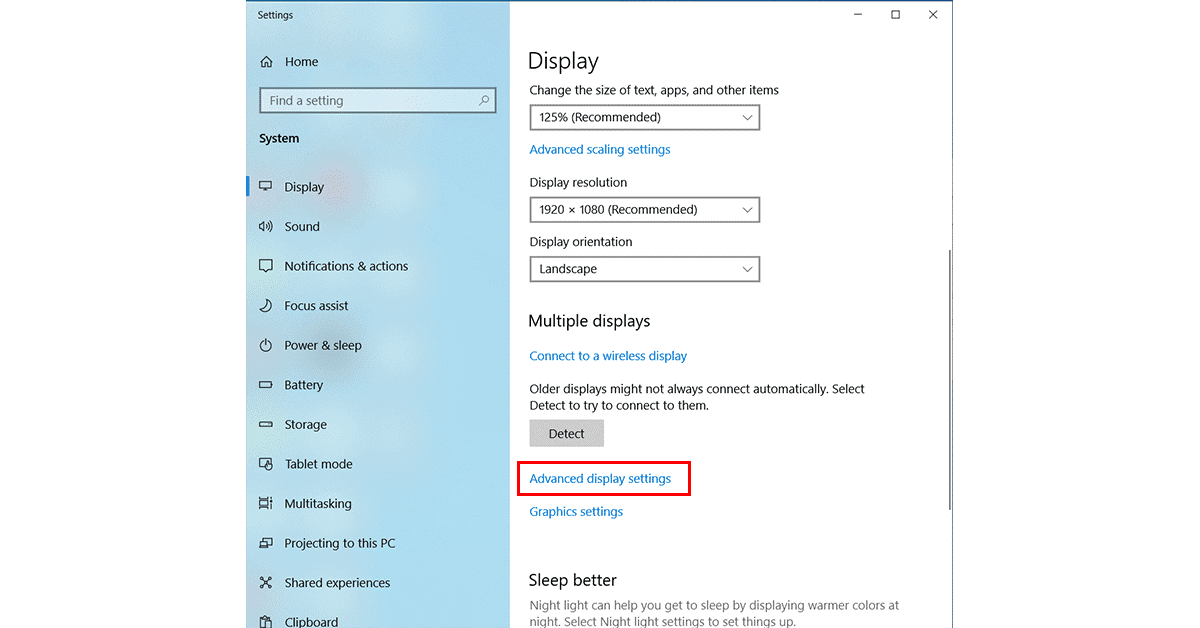
- This will automatically redirect you to the Display Settings Box. In the Display Settings box, select Advanced Display Properties.
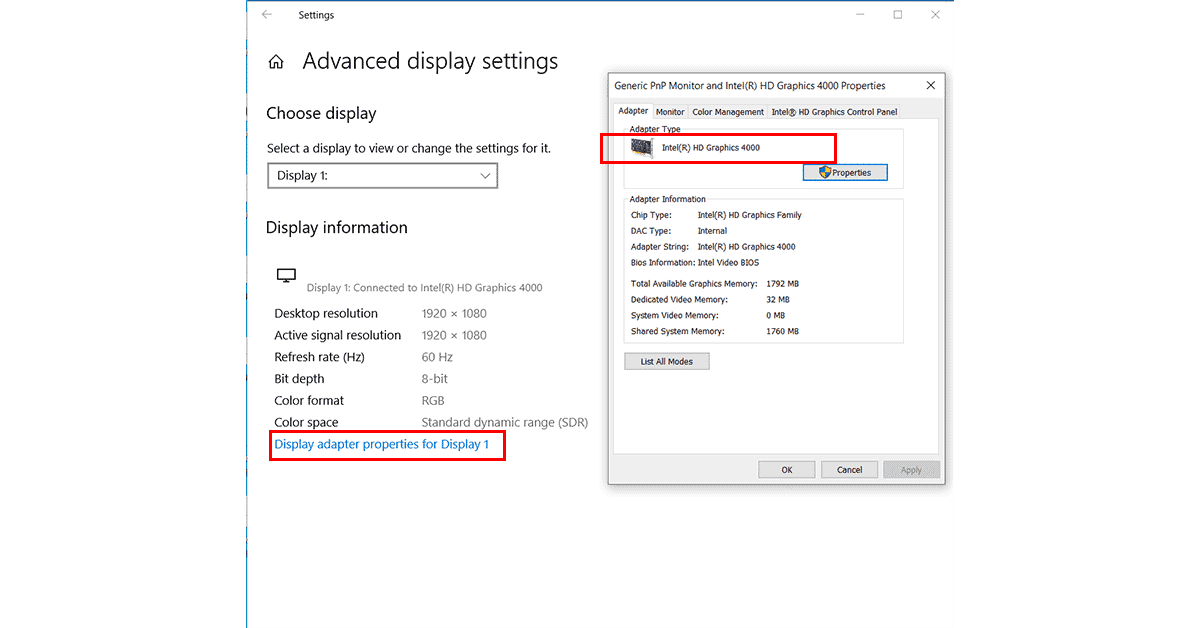
- In the Adapter tab, you will see the name of the graphics card that is built into your PC, as well as the memory specifications.
Method 2 –
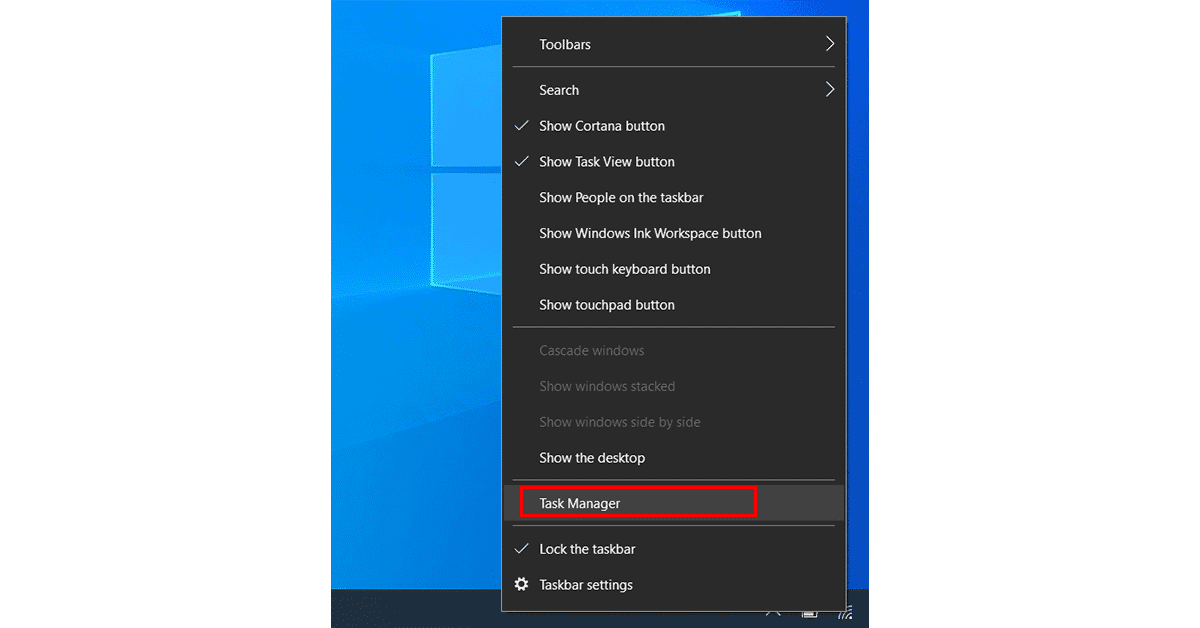
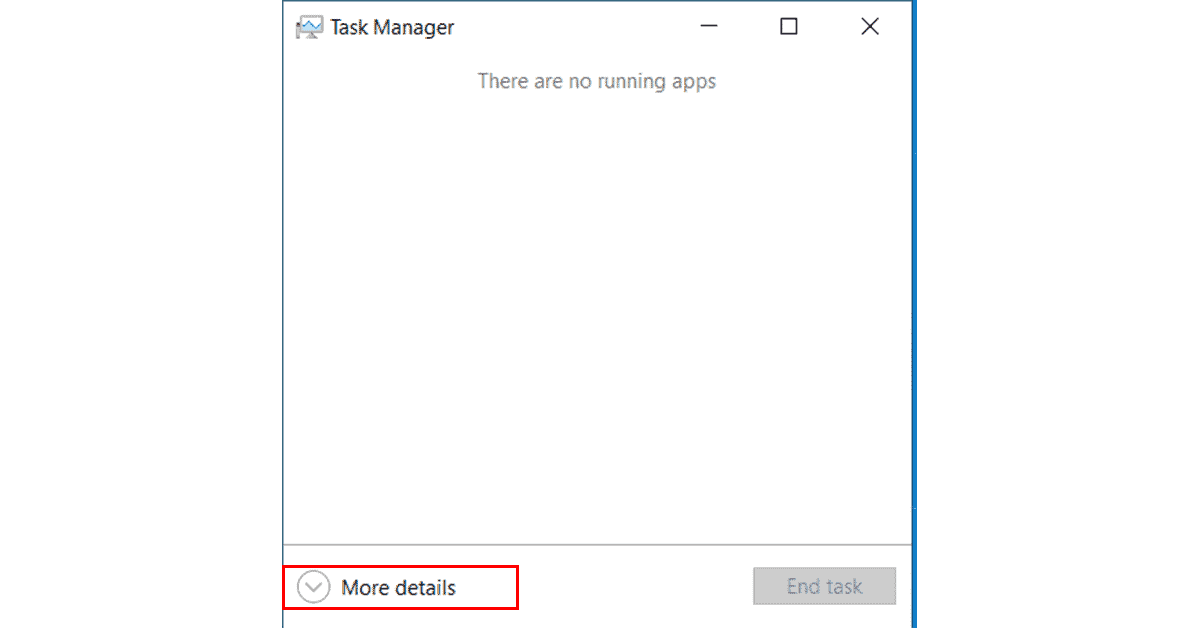
- Right-Click on the Task Bar and open the Task Manager.
- Initially, if you do not see any additional options, just click on the More Details dropdown.
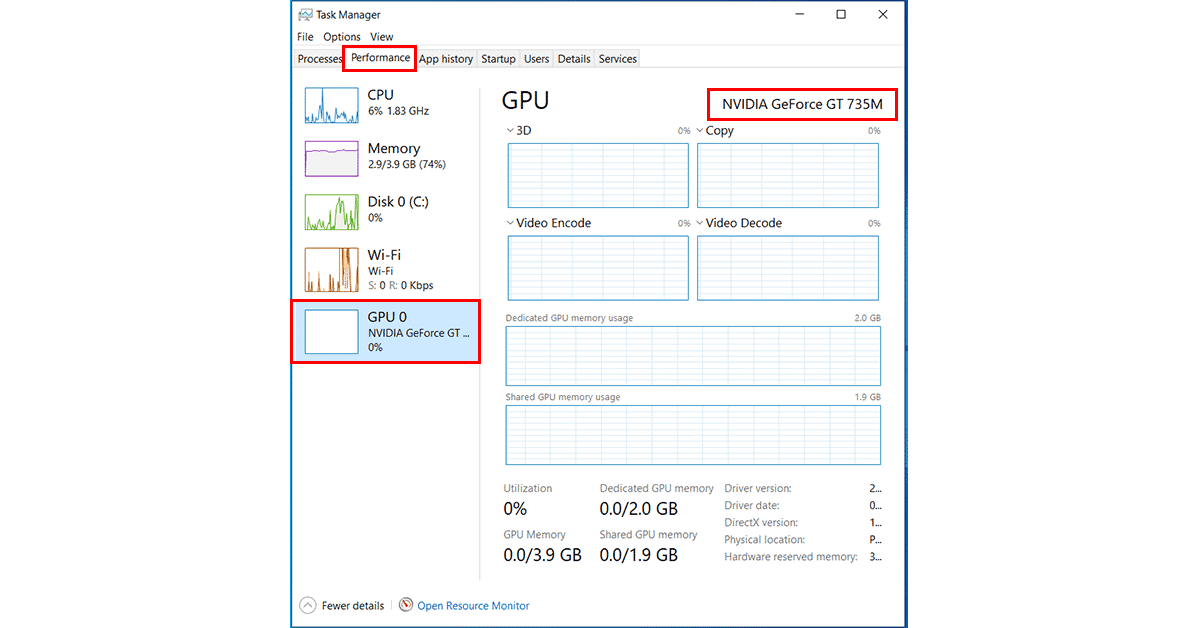
- Select the Performance tab, and click on the GPU.
- The Task Manager will now display the name of the Graphics card that is installed as well as real-time performance metrics.
This is how you can quickly check the Graphics Card on your Windows 10 PC/Laptop.
