

Screenshots can be useful for a number of purposes. You can, for example, send copies of error messages to support services, show a friend your gaming screen, or record a tweet that you believe will be erased in a few minutes. Today’s laptops, including Chromebooks, all have the means to snap screenshots.
Chromebooks can be perplexing for individuals coming from another platform, especially because their keyboards differ from those seen on Macs or Windows PCs. Some keys from other computers have been removed, while others have been added. Fortunately, there are two methods for taking Chromebook screenshots: utilizing key combinations or the Quick Settings pop-up.
Number 1. Taking screenshots using the quick settings
Step 1. In the lower-right corner of your screen, click the clock. This will open the Quick Settings menu.
Step 2. Select the Screen Capture icon.
Step 3. A little menu with numerous icons will appear at the bottom of the screen. They will include, from left to right,
- Screenshot for still captures
- Screen recording for video captures
- Full-screen screenshot
- Take a partial screenshot (a crosshair icon will appear; click and drag it until the part of the screen you want to copy is highlighted and then let go).
- Take a windows screenshot (for a single window)
- Settings
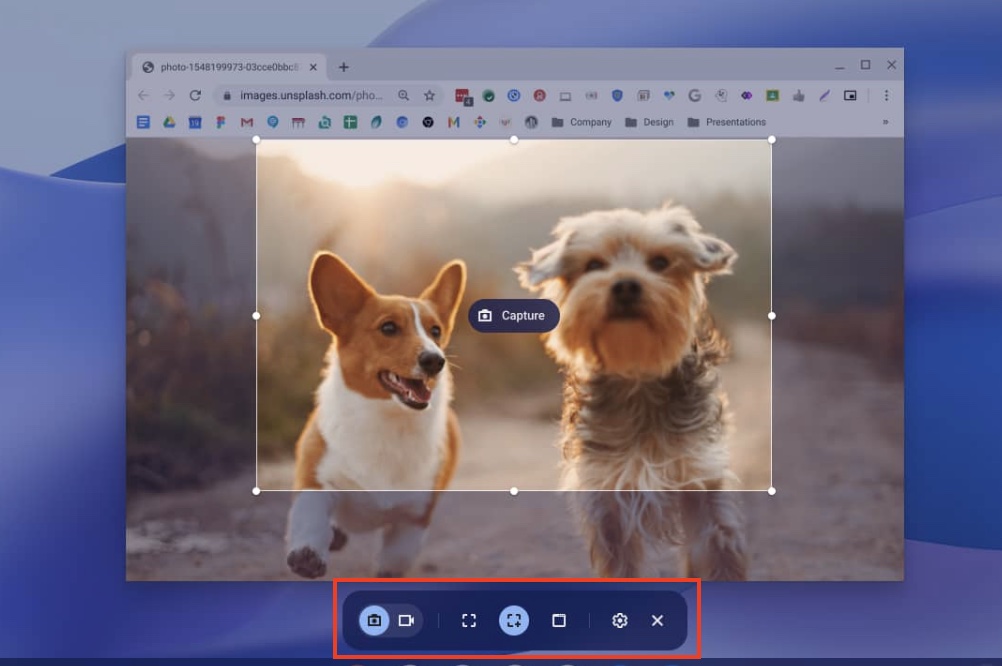
When you click the Settings icon, you may change your audio input, decide if your microphone should be live, and choose where you wish to save your screenshots or recordings.
Number 2. Using the Chromebook keyboard
If you find the whole quick settings solution to be a bit of a hassle, or for some reason, it is not responding as expected, you can use the hardware keys on the Chromebook keyboard to get the job done.
Use the Ctrl + Show windows key combination to capture a screenshot of the entire screen. The Show windows key is located on the top row of the keyboard and resembles a rectangle with two lines on the right side.
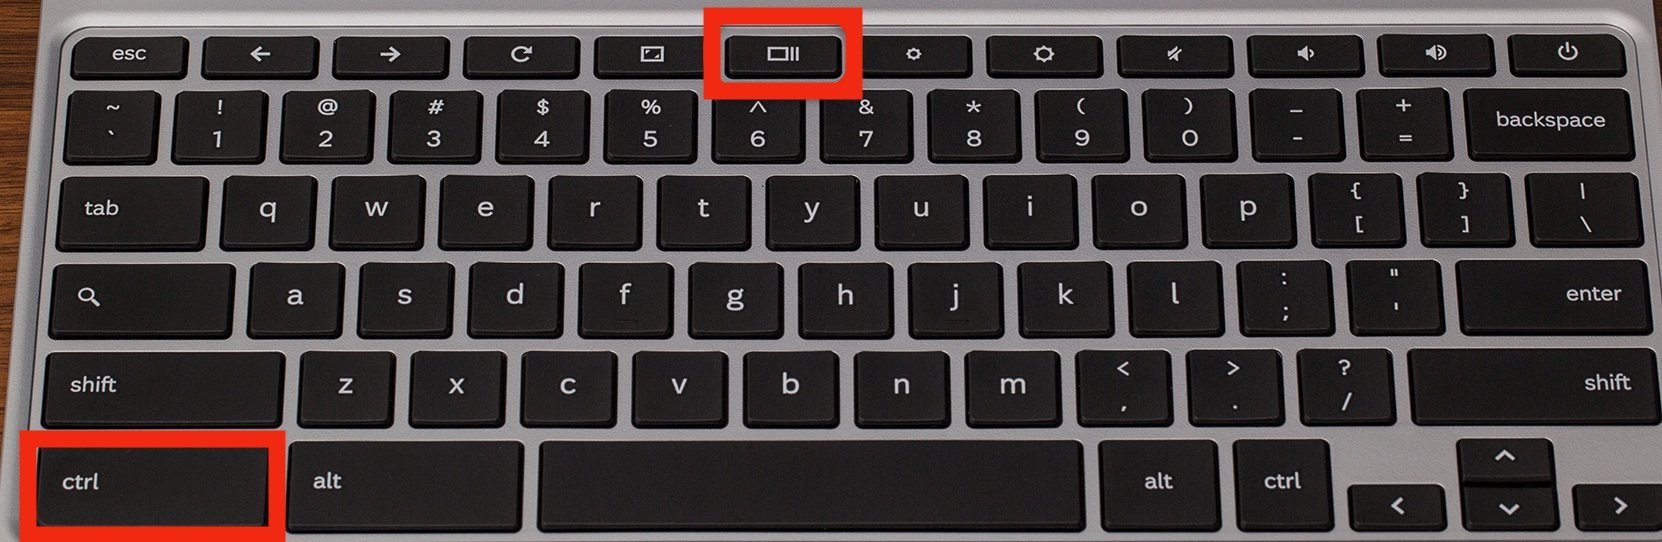
To access the same menu as if you went into the Quick Settings menu, press Shift + Ctrl + Show windows.
After taking the screenshot, a copy will display in a pop-out window just above the Quick Settings menu. To see it in the folder, click on it. Any screenshot you take will be saved to the Downloads folder by default, but you can alter this by clicking the Settings button in the Screen Capture menu. You may also use the Edit and Delete buttons.
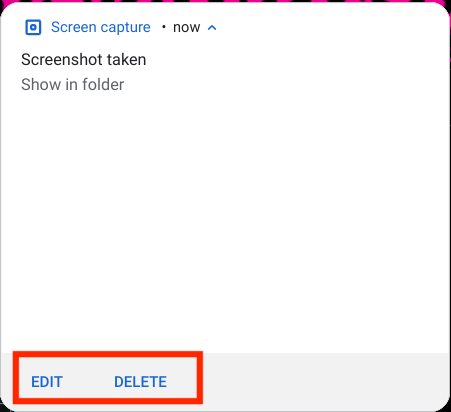
The Edit option will launch a rather helpful software that allows you to conduct simple activities like cropping and rotating, rescaling, annotating, and changing the lighting.
