

In this article, we will take a look at how to copy music from your iPod to your Windows 10 PC/Laptop.
Let’s get started –
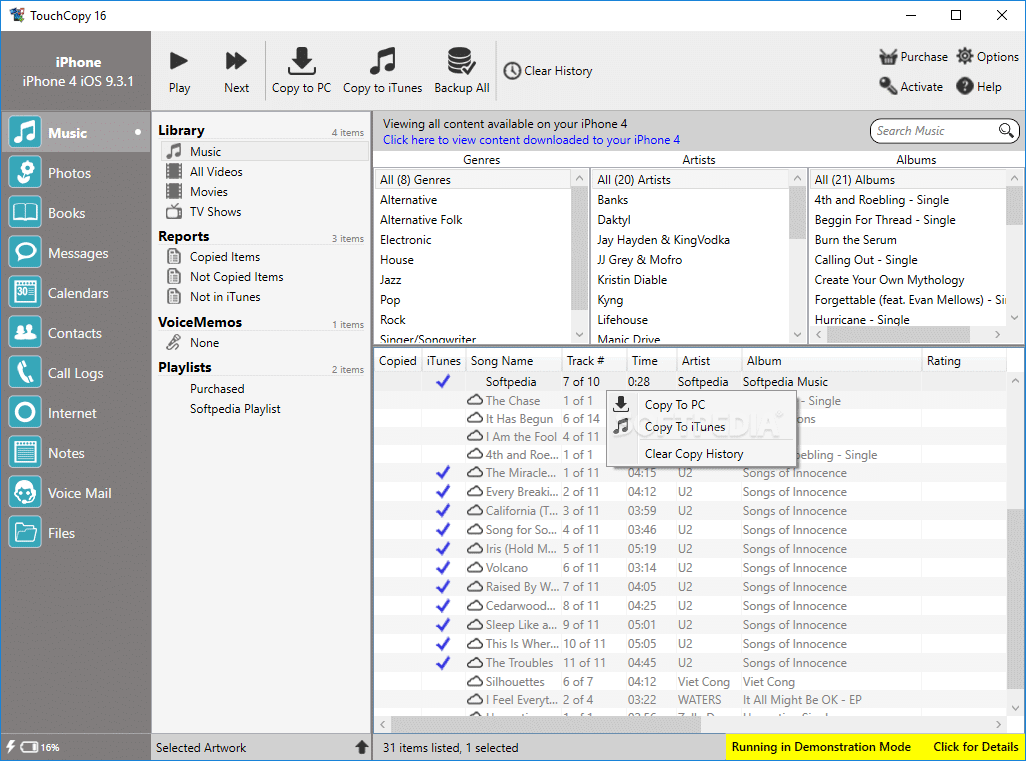
Method 1 – Using the TouchCopy tool
- Download and install TouchCopy on your PC or laptop.
- Run TouchCopy and connect your iPhone, iPad or iPod. Wait for TouchCopy to find your device and display your Music.
- From the list of your device’s music, select the songs you wish to copy. You can select multiple tracks and playlists by shift-clicking or ctrl-clicking them in TouchCopy.
- Click “Copy to PC” in TouchCopy.
- Choose where to save your music to your computer.

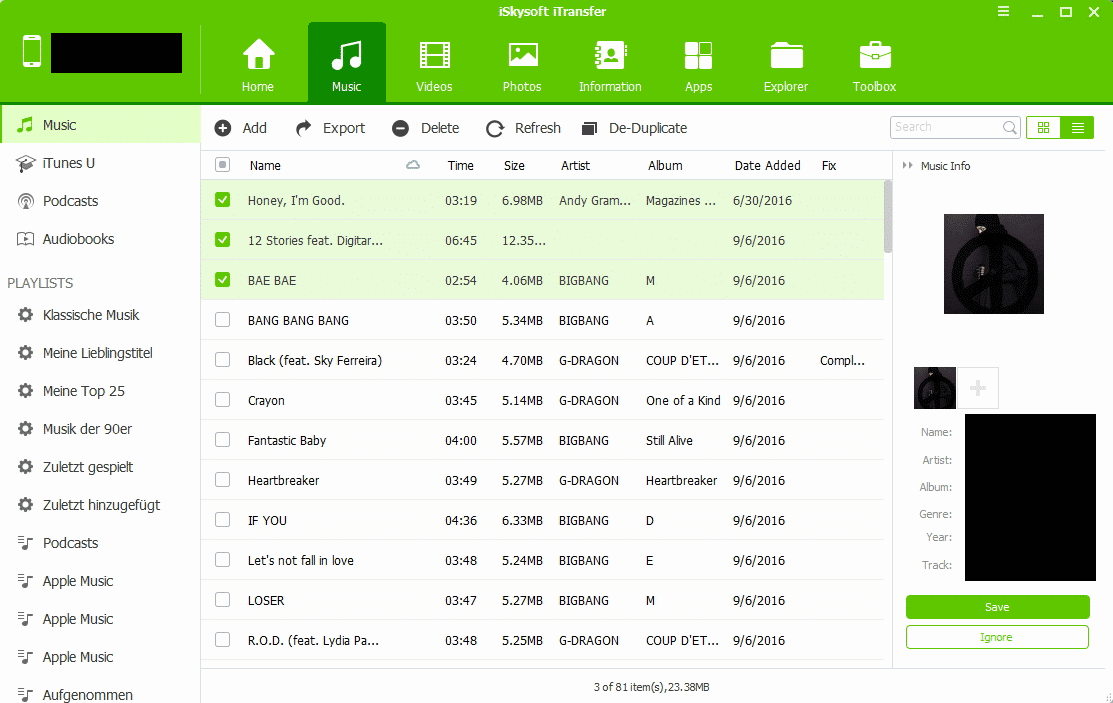
Method 2 – Using the iTransfer software
- Connect to your iPod to your computer and run the iTransfer software. Once detected, your iPod name will appear on the top left-hand side.
- From the top menu, select the Music option. Your songs will now be displayed in a list form. Here you can individually select the songs that you want to backup to Windows 10.
- When you’ve made up your mind, simply click the Export button under the top menu and then Export to PC from its drop-down menu. iTransfer will now open up a dialog box asking you where you want to save the iPod songs.
- After specifying a location, the only thing left to do is click the Save button in the dialog box and this program will start extracting music from iPod and save to your Windows 10 computer hard drive.
- Your tunes will now be saved in that desired location.
These methods can be used to successfully transfer music from your iPod to your Windows 10 PC/Laptop.
