
If you read the title and thought that it is a typo, it is most definitely not. We have got access to an early build of Windows 11, the upcoming OS release from Microsoft and while the features are still only half baked, the whole platform is in decent working condition, and in the next few articles, we will be walking you through some of the features on Windows 11, how they have changed, and how you can use them for your work.
In this tutorial, we will be focussing on the task of taking screenshots on Windows 11. In the current build of Windows, taking a screenshot is fairly simple and while the essence is still the same on the newer Windows 11 platform, there are subtle changes that make the process a little more streamlined.
Without further ado, let’s take a look at how you can take a screenshot on Windows 11.
Number 1. Using the Snip tool
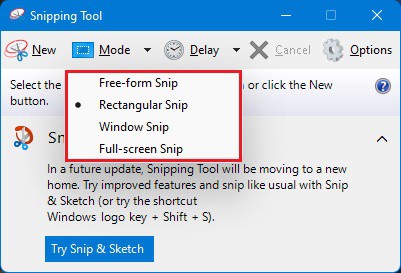
Windows 11 features a built-in snipping tool that you can access by simply pressing the ‘Windows + S’ buttons and then searching for the snipping tool. Once it opens, you will be presented with a similar window as the Windows 10 version, and you will see a button termed as ‘mode’. Clicking this mode button drop-down will present you with options that truly let you maximize the screenshot operation. These options are. –
- Free Form Snip – This mode allows you to can screenshot content on the screen by drawing a pattern using your mouse. This is useful when you want to screenshot an image on a webpage or a certain paragraph without really including embedded images.
- Rectangular Snip – In this, you can capture content on the screen within a rectangle that you can draw of any size, using the mouse or trackpad.
- Window Snip – This mode is useful when you want to screenshot a specific window that is open on your desktop.
- Full-Screen Snip – As the name suggests, this mode allows you to take a screenshot of the entire screen.
Once you pick the mode you want to use for the screenshot operation, this is what you need to do next –
Step 1. Click on the ‘New’ button that is next to the ‘mode’ button that we saw earlier.
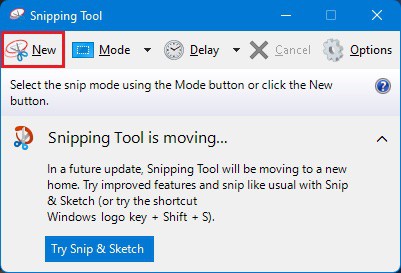
Step 2. Depending on the mode you have selected, you can draw the freeform shape, rectangle, or pick the window you want to screenshot.
Step 3. You will now see a preview of the content that has been captured, and you can now edit it and then save it in a location of your choosing.
Number 2. Using the Print Screen option
The other way you can capture a screenshot and save it on the hard drive of your Windows 11 PC, is by using the print screen feature. Simply pressing the ‘PRT SCN’ button on the keyboard will take a screenshot of the entire screen.
Now, if you press the Windows button and the PRT SCN buttons together will grab the screenshot of the entire screen and save then in a ‘screenshot’ folder within the Pictures section.
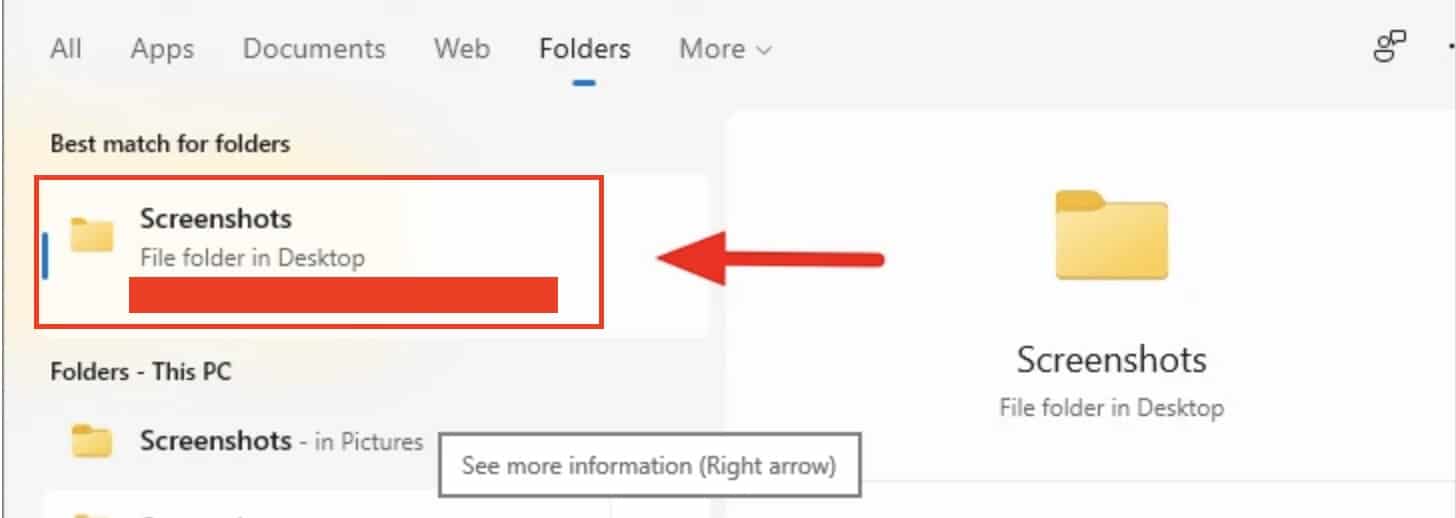
In order to navigate to this screenshots folder, you can simply head over to the pictures folder and then to the screenshots folder. In this folder, you will see a list of the screenshots that you have taken, labeled using numbers.
You can now edit the screenshot, save it in another location, and even share it with your contacts.
One thing you will notice here is that both methods may seem identical to the ones available on Windows 10, which makes it easy to get started right away. We will be covering more Windows 11 topics in the coming articles, so stay tuned to the website for more.
