

Images are a great way to share or represent your ideas in a more visual manner. Nowadays, people prefer communication more with images than just plain text, and sometimes, you may want to source an image from the internet for your projects or assignments.
One of the most popular activities on the internet is downloading images, and on the Mac, it is very easy to download images from the internet, irrespective of where the image is found.
In this tutorial, we will show you how to save images on a Mac or Macbook.
Method 1 – Using the standard approach
Step 1. Open your web browser and browse to the image you want to save.

Step 2. Right-Click on the image, you want to save.
Step 3. Click on the ‘Save Image as’ option from the drop-down menu.
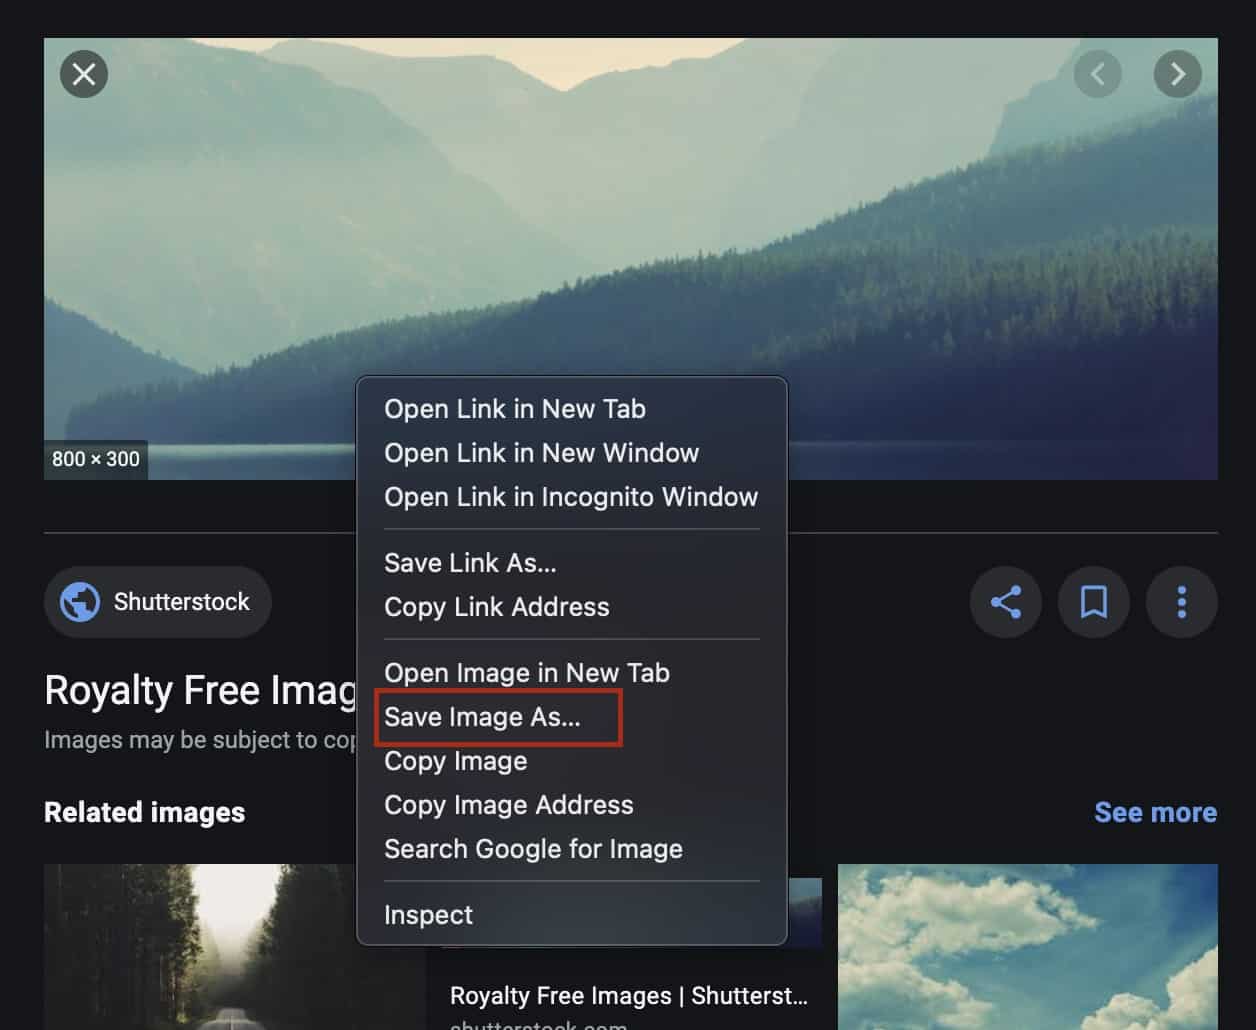
Enter the title of the image is saved and the desired save location.
The image will now be saved on your computer.
Method 2 – Screenshot the image
Step 1. Browse to the image you want to save on your Mac or Macbook.

Step 2. Press the key combination – Command+Shift+4.
Step 3. Drag around the image and release the mouse button.
Step 4. The image will now be saved as a screenshot on your Mac Desktop.

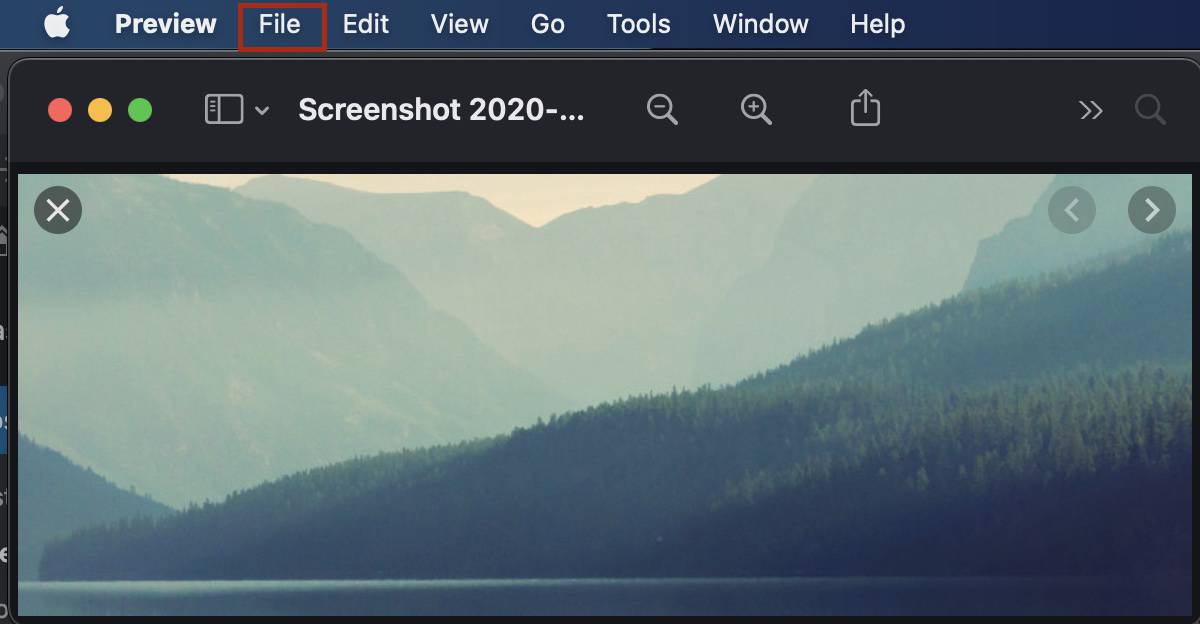
Step 5. Now, Double click on the saved screenshot and Click on the ‘File‘ option.
Step 6. From the drop-down menu, click on the ‘Export‘ button.
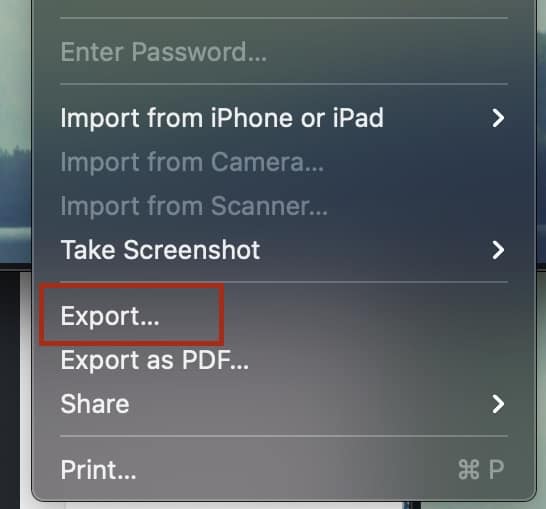
Finally, enter the credentials, choose the File type, and click on the export button to save the image on your Mac, in the desired location.
