

Fallout 3 is one of the classic PC games ever made, but unfortunately, due to its dated nature, it does not normally work on Windows 10. In this article, we will take a look at how you can make the classic Fallout 3 game work on your Windows 10 PC/Laptop.
Method 1 – Run Fallout 3 as an Administrator
1. First, you have to navigate to the Fallout 3 folder within your Steam folder. The default location of the Fallout 3 folder is:
X:\Program Files (x86)\Steam\steamapps\common\Fallout 3 goty
OR
X:\Program Files (x86)\Steam\steamapps\common\Fallout 3
2. Right-click on the .exe file for Fallout 3. and you will get a drop-down menu.
3. From the drop-down menu, click on Properties. You will now get the properties window with various options.
4. In the Properties window, navigate to the Compatibility tab.
5. Enable the Run this program as an administrator option by checking the checkbox located directly beside it.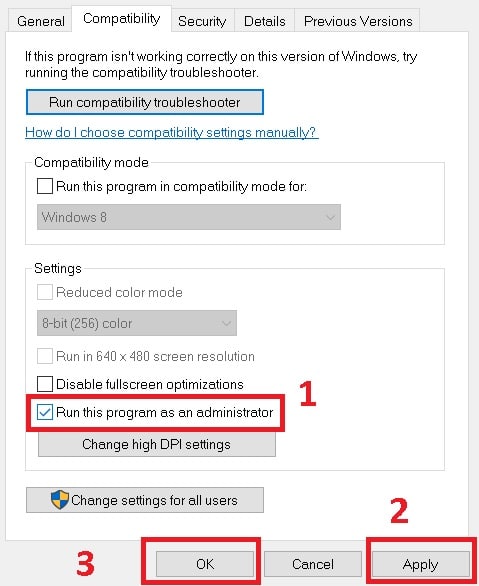
6. Click on Apply.
7. Click on OK.
8. Launch Fallout 3 and check to see if the issue has been resolved.
Method 2 – Run Fallout 3 in Compatibility Mode
1. Navigate to Fallout 3 folder within your Steam folder. The default location of the Fallout 3 folder:
X:\Program Files (x86)\Steam\steamapps\common\Fallout 3 goty
OR
X:\Program Files (x86)\Steam\steamapps\common\Fallout 3
2. Right-click on the .exe file for Fallout 3. This will give you a drop-down menu.
3. From the drop-down menu, click on Properties. The properties window will now open.
4. In the properties window, navigate to the Compatibility tab.
5. Enable the Run this program in compatibility mode for option by checking the checkbox located directly beside it.
6. Open the dropdown menu located directly underneath the Run this program in compatibility mode for option and click on Windows XP (Service Pack 3) to select it.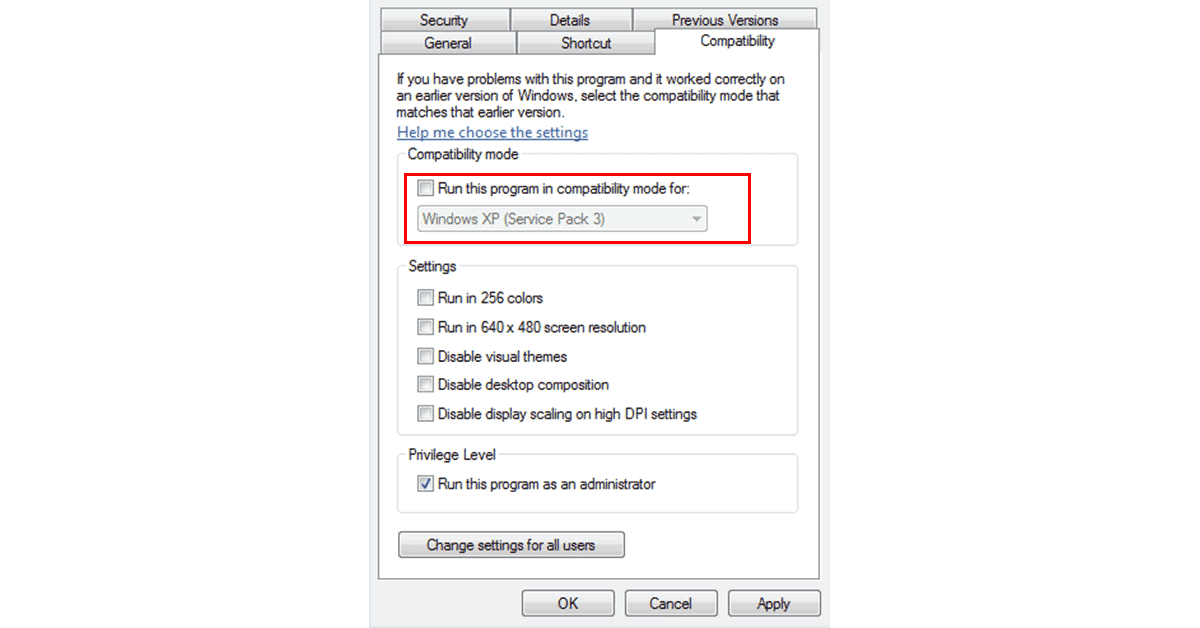
7. Click on Apply and then on OK.
8. Once done, try launching Fallout 3 and check to see whether or not the problem you were facing has been fixed.
Method 3 – Download And Install the Games for Windows Live Application
1. Download the installer for Games for Windows Live.
2. Once the installer has been successfully downloaded, navigate to the directory you saved it in and double-click on it to launch it.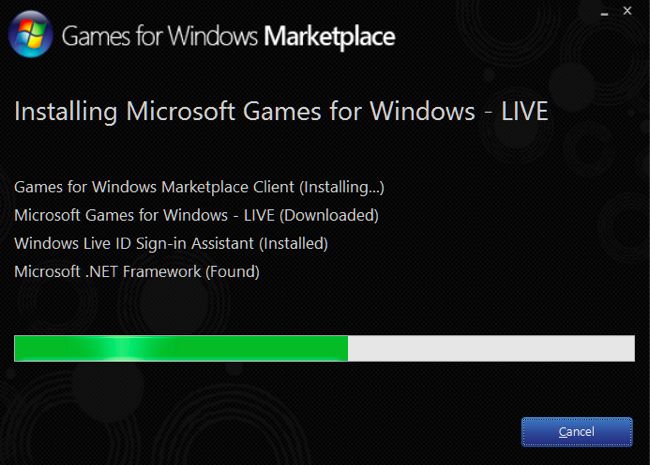
3. Follow the onscreen instructions and go through the installation wizard, at the end of which Games for Windows Live will be installed on your computer.
4. Once the Games for Windows Live application has been installed, launch it.
5. Games for Windows Live will automatically download all the files Fallout 3 needs to run on your computer.
6. Once done, close Games for Windows Live and try launching Fallout 3.
Method 4 – Edit The Falloutprefs.ini File
1. Navigate to My Documents\My Games\Fallout3.
2. Locate a file titled falloutprefs.ini.
3. Open the falloutprefs.ini file and double-click on it to open it in a new instance of Notepad.
4. Locate
bUseThreadedAI=0
within the contents of the file and change the 0 to a 1. If you don’t see bUseThreadedAI=0 anywhere in the entirety of the file’s contents, simply add
bUseThreadedAI=1 in a new line within the file.
5. In a new line within the file, type iNumHWThreads=2.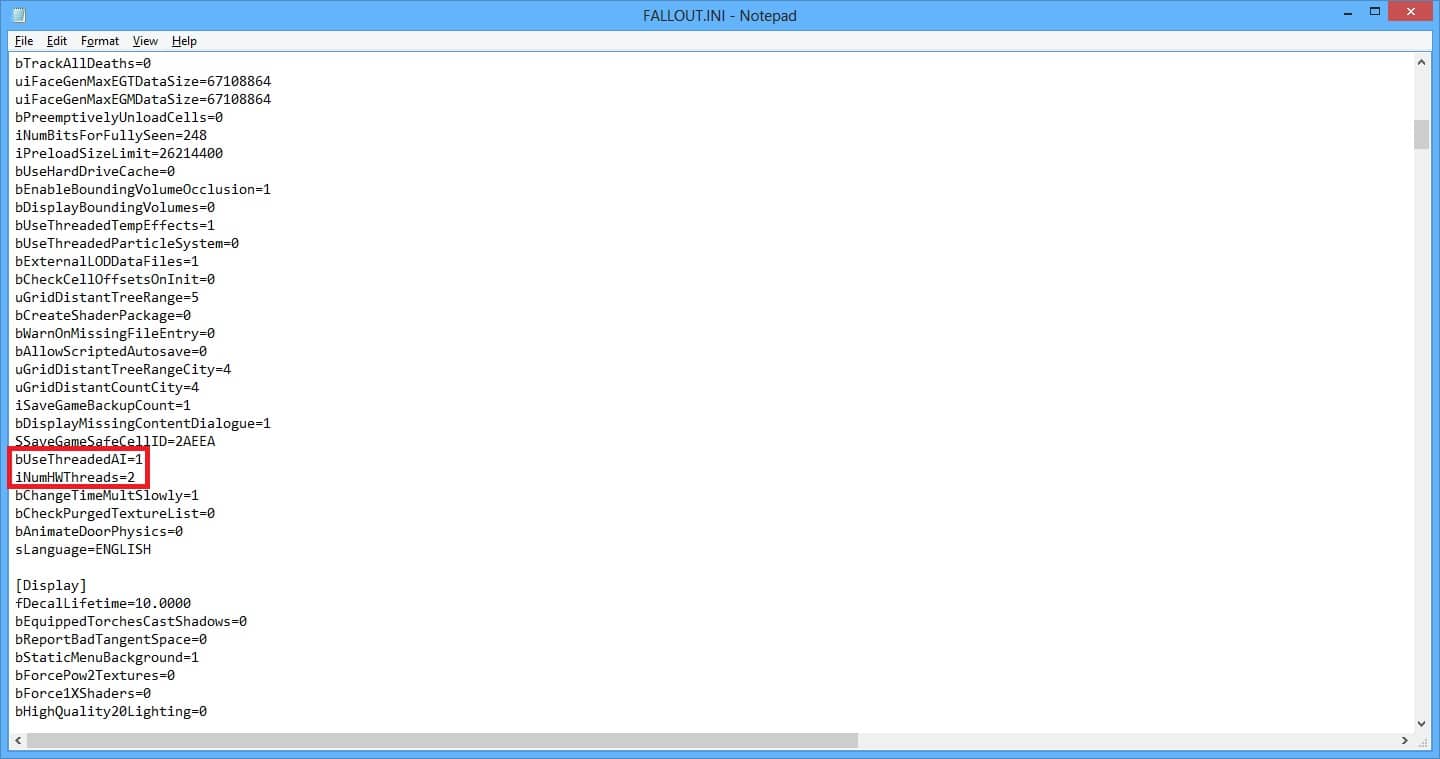
6. Press Ctrl + S to save the changes you have made to the falloutprefs.ini file and close the instance of Notepad.
7. Run Fallout 3 and check to see whether or not the changes you made managed to get the job done.
You can use these methods to run the iconic Fallout 3 on your Windows 10 PC/Laptop.
