

When you buy a new iPhone, you will see that whenever you try and scan for it from another device, it will identify itself as ‘iPhone’. This is not an issue if there is just one iPhone in the vicinity. However, if there are multiple iPhone devices in the area, you will see that most of them will identify as ‘iPhone’ only, and this can get very confusing.
To help you avoid such confusion, there is a feature within your iPhone, that lets you rename the device to your liking, and this also will help other users from identifying your iPhone among others in the area. The surprising thing is that not many iPhone users even know this exists, but once they do, almost everyone has exercised this feature to create some really special names for their iPhone devices.
In this tutorial, we will show you how to change the name of your iPhone.
Table of Contents
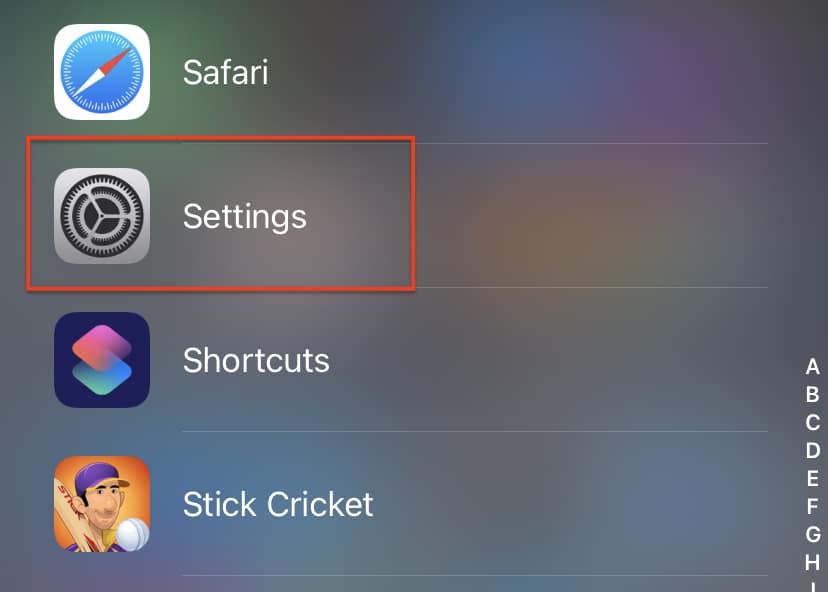
Open the ‘Settings‘ app on the iPhone.
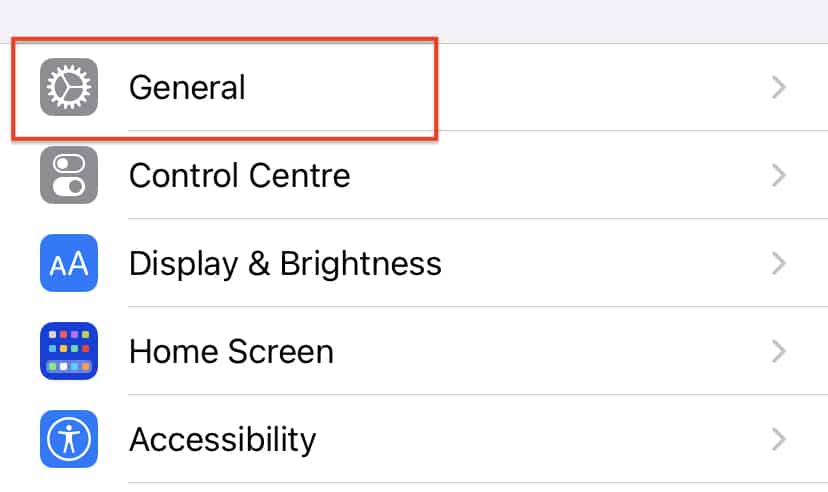
Scroll through the settings menu and tap on the ‘General‘ option.
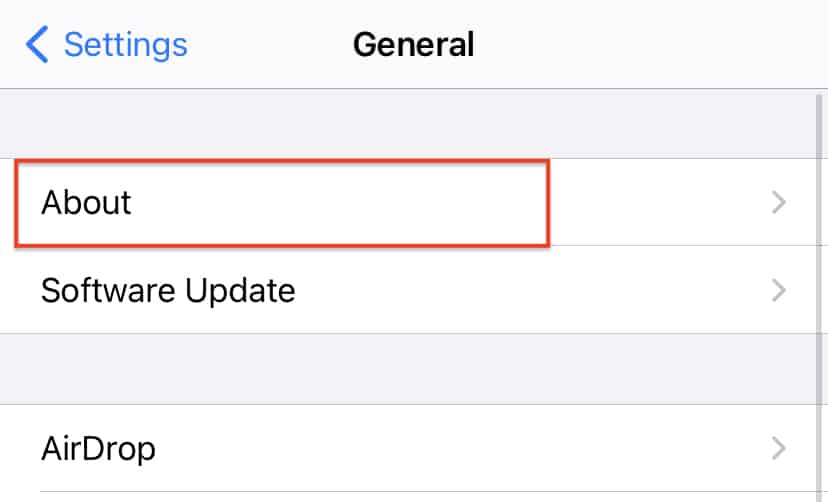
Now, tap on the ‘About‘ option from the general settings menu.
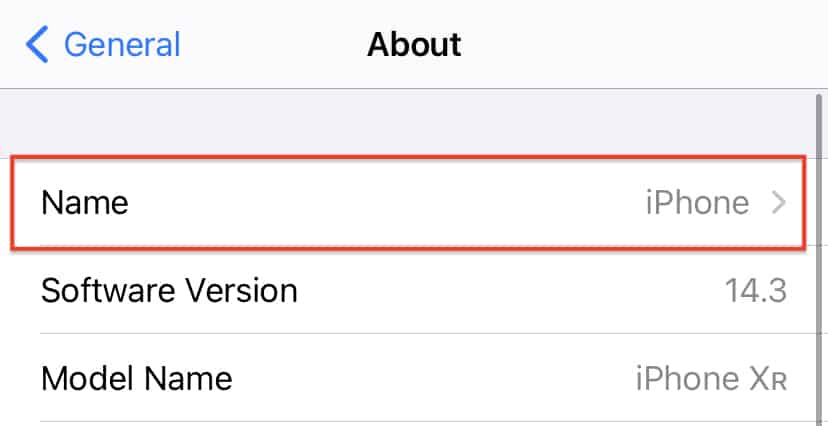
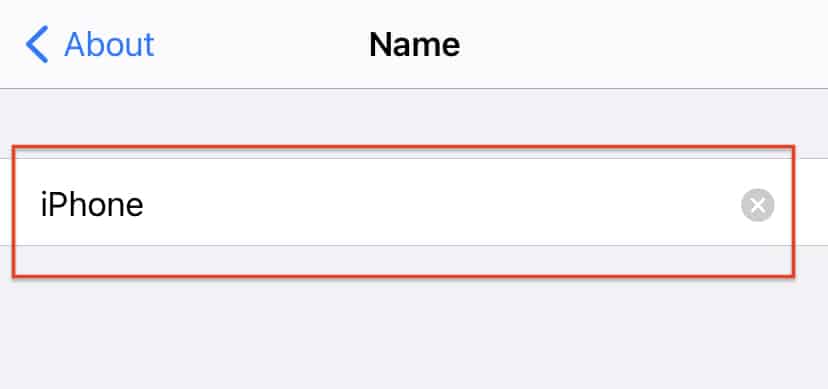
Tap on the ‘Name‘ tab and you will see a text entry window.
Enter the new name for your iPhone device.
Once you confirm the changes, your iPhone will start showing up with the new given name, whenever you try to search for it on the AirDrop feature or even try to connect to it via Bluetooth.
The ability to rename your iPhone allows the users a level of customization and it can be used to a lot of creative results if you have the imagination. Earlier, the iPhone had to be plugged into the iTunes software in order to make these changes. However, thanks to the evolution of the iOS platform, you can make all these changes and more straight on your iPhone.
