

The iPhone from Apple is an all-rounder device. Not only does it let you accomplish tasks that are heavy on the processor or graphic intensive, but it also allows you to accomplish more minor tasks as well. One such menial task is that of setting the time.
While the time on the iPhone is set automatically through the network, you can always make changes to it if you feel that the current time is off by a few minutes. What’s more, the moment you set the time for your time zone, you can also check the corresponding time on other time zones as well, which is useful when you are trying to stay in touch with clients who are abroad, or even friends or family members who stay at a different place.
If you are an iPhone user and you want to know how you can change the time on your device, this tutorial is for you. Let’s take a look at how you can set the time on the iPhone.
Table of Contents
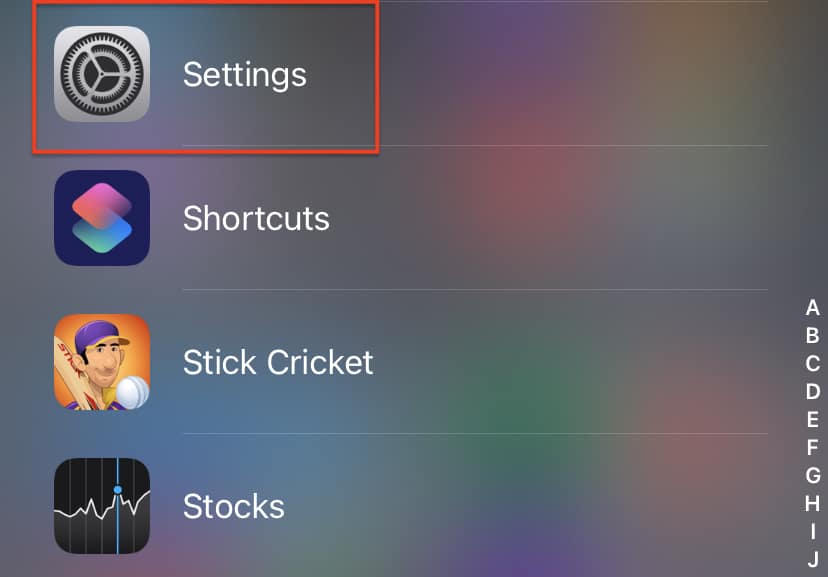
Step 1. Open the ‘Settings‘ app on the iPhone.
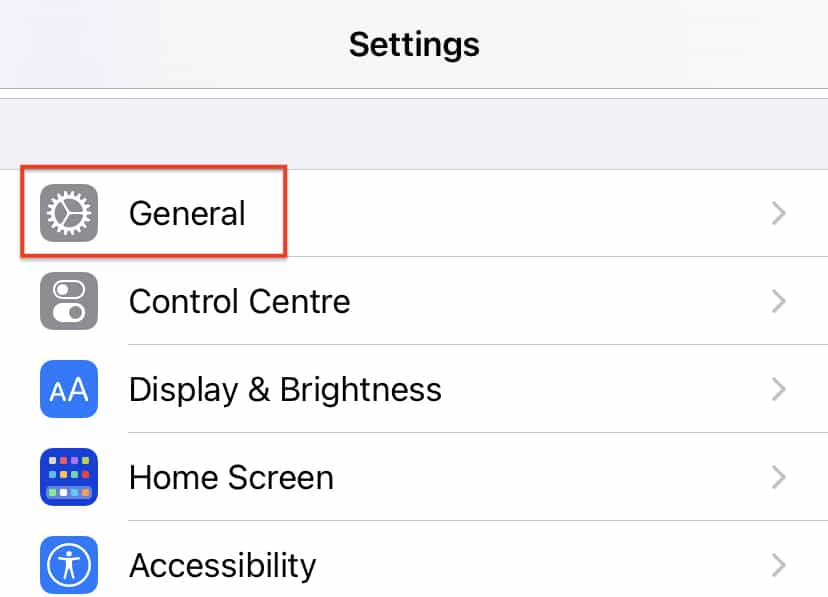
Step 2. Scroll through the settings menu and tap on the ‘General‘ option.
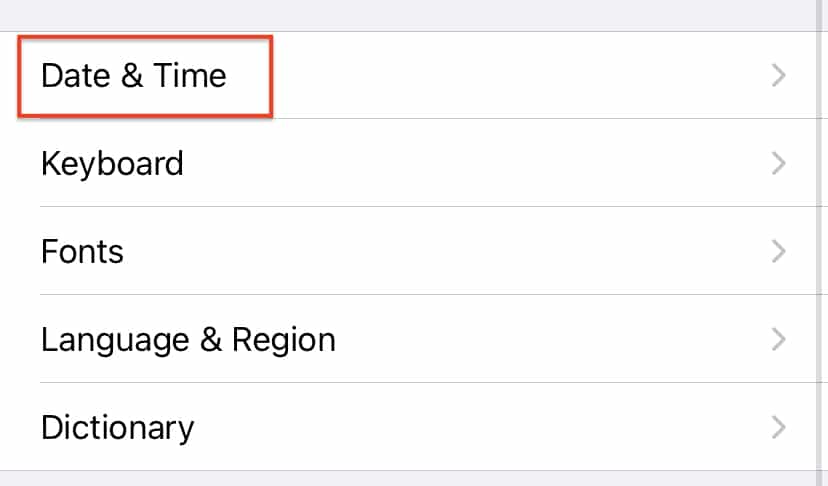
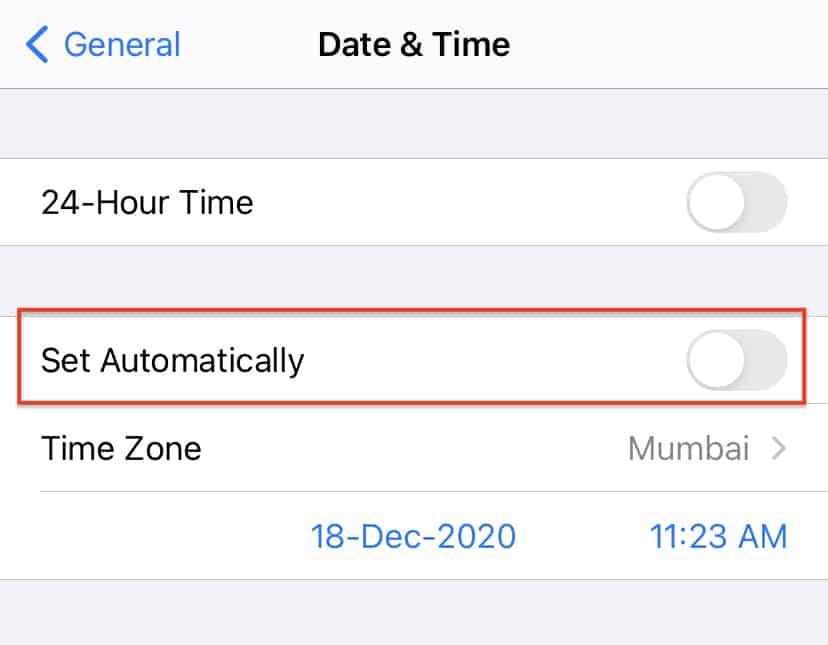
Step 3. In the general settings menu, tap on the ‘Date and Time‘ option.
Step 4. You will see that the ‘Set Automatically‘ option is enabled.
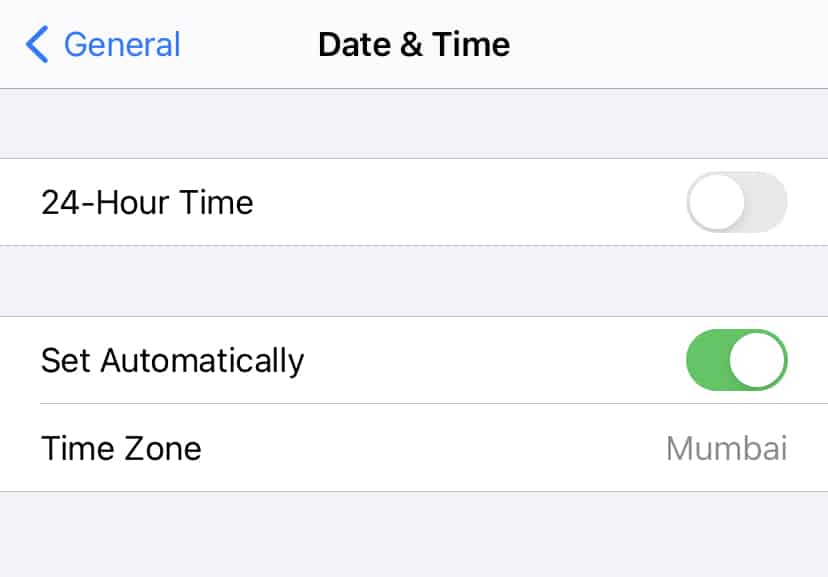
Step 5. Toggle ‘OFF‘ the ‘Set Automatically’ option.
Step 6. Tap on the Time to reveal a calendar and timing chart.
You can now set the desired time depending on where you are in the world. The iPhone will now treat this as the official time and maintain time with reference to this new setting. However, if you feel that the automatically set time was a lot more accurate, you can just toggle ON the set automatically option and the device will take care of the rest.
