

We interact with a lot of files on the Mac on a daily basis. This includes downloading files, saving files, creating or editing files, and finally, deleting files. Sometimes, when we download or create the file, the first thing we want to do is give it a name that you can remember and access it sooner. Fortunately, the Mac/MacBook series allows its users to easily rename files that they have on the system, and they can do it any number of times. The procedure is simple and in this tutorial, we will walk you through it, so without further ado, let’s get started.
Unlock the Mac/MacBook device to reveal the Home Screen.

Browse to the file that you want to rename.

Right-Click on the file to reveal a drop-down menu.
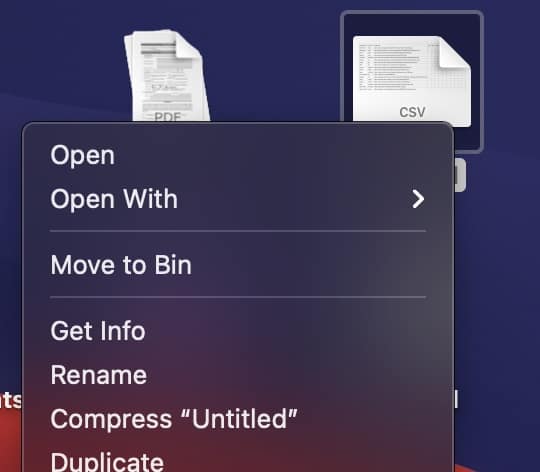
Click on the ‘Rename‘ option from the menu.

Type in the new name for the file and click outside the window to reflect the change.

You can rename absolutely all kinds of files using this technique unless the file has been restricted or blocked from access. If you are the admin on the Mac/MacBook and you don’t want to allow the other users to edit the contents of files on the computer, you can restrict access to the desired files and folders in order to protect the identity of the folders and avoid unnecessary mischief.
