

The all-new Windows 11 OS from Microsoft has something to offer to all types of users, but the one thing that remains at the forefront is the focus on security. Over the years, the antivirus market has evolved, with many third-party vendors bringing in their offerings, in an attempt to keep their customers’ PC and laptop devices, protected from viruses and malware that may try to cause havoc and even tamper with the onboard data.
However, some of these third-party applications have been exposed for actually introducing malware attacks and then getting rid of them in order to show users that it is working. Sometimes, this has not worked and as a result, the PC was left compromised. In an attempt to bring this notorious software and its vendors down, Microsoft introduced a revamped version of Windows Defender. This application/feature has been a part of the Windows operating systems for some time now, but Windows 10 and now, Windows 11 have made it the absolute go-to application for your PC protection.
We strongly recommend keeping the Windows Defender application activated on your Windows 11 PC as this essentially removed any and all dependency on third-party antivirus software. However, if, for some reason, you want to turn off this feature, we will tell you how you can do it, in this tutorial.
Without further ado, let’s get started.
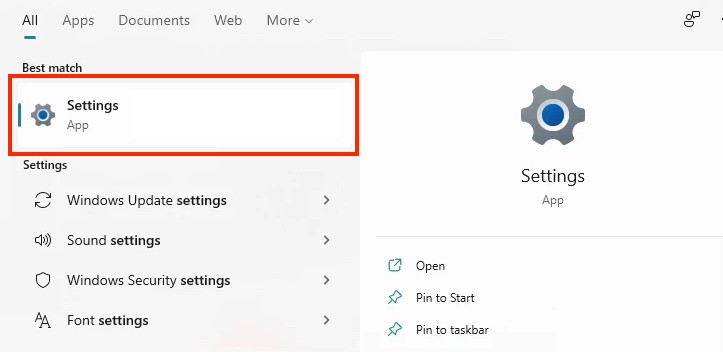
Step 1. Open the settings application on your Windows 11 PC or laptop.
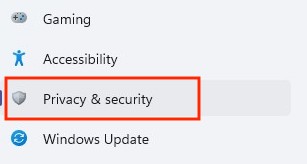
Step 2. On the left-hand side pane, click on the Privacy and Security tab.
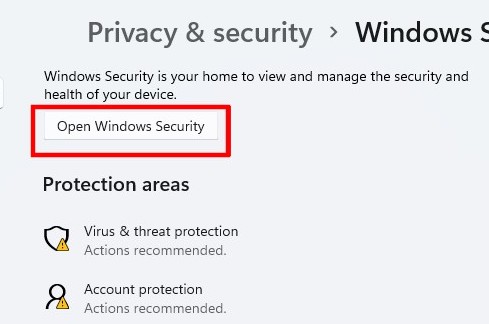
Step 3. Now, on the right-hand side window, click on the Windows Security option.
Step 4. Next, click on the Open Windows Security button.
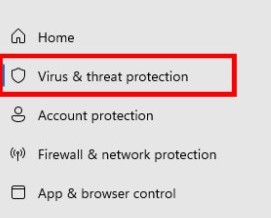
Step 5. Again, on the left-hand side pane, click on the Virus and Threat protection tab.
Step 6. Finally, toggle off the real-time protection option. Additionally, you can even toggle off the cloud protection option.
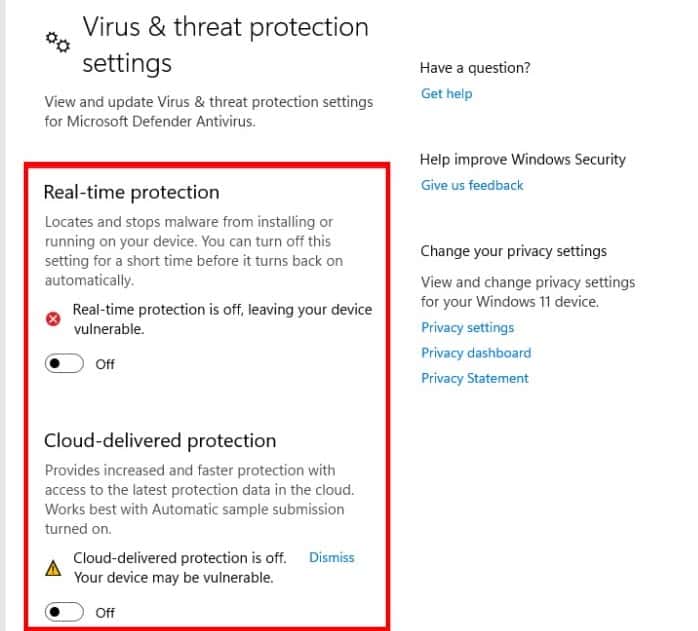
Once you do this, the Windows Defender feature will be disabled and will make your PC vulnerable to malware or other issues. We highly recommend that you perform this tutorial only as an experiment and make sure that you re-enable the Windows Defender to keep your Windows 11 PC or laptop secure.
